
Cover assembled from in-game Anima artwork. The numbers on it are our editorial order, not an official rating.
Checked October 17, 2026. Every Honkai Nexus Anima 5-star Anima with a confirmed Evolution Test kit is ranked here, fifteen in all. Two of them are the units you build a board around, eight are good under conditions you can name, two are fine, and three lose to the better 4-stars. For each one, the entry below gives the skill clause that decides its place and what your board needs for that clause to pay off.
Updated November 10, 2026: Aspects and Traits now follow the 0.60.0 data update (Anima data). Among the fifteen ranked here, Chowpownd, Cumulon and Hoppelon changed Aspect, and several Traits changed. The order of the fifteen is unchanged.
How this was assessed. Every skill clause quoted here comes from the Evolution Test (July 9 to 27, 2026) data on our Anima Database. Tiers match our Anima Tier List, which the database generates. The order inside each tier, the conditions under which a unit fails, and the Level 18 advice are editorial theorycraft. We have not run these boards in a live client, and global balance can change any of it.
The order, with the one clause that decides it
| # | Anima | Aspect · Trait | Tier | The clause that decides it |
|---|---|---|---|---|
| 1 | Mesmerith | Hate · Hothead | S | 1.5s Stun on anything hit by all three sleepwaves |
| 2 | Bladehound | Strength · Explorer | S | ATK scales with 2% of Max Health |
| 3 | Camcorgi | Memory · Blaster | A | Attacks on freeze-framed targets always crit |
| 4 | Chowpownd | Insatiability · Protector | A | Row-wide shield plus 24% Attack SPD for 8s |
| 5 | Cumulon | Strength · Blaster | A | 18 swords aimed at the lowest-Health enemies |
| 6 | Lumehart | Light · Cherubim | A | MR shred that stacks until the end of battle |
| 7 | Hoppelon | Reality · Explorer | A | Splits into three hoplites when its shield breaks |
| 8 | Cinechel | Memory · Striker | A | Self-heals, then 30% Armor Shred in a 2-hex radius |
| 9 | Dragamour | Love · Biggun | A | Alternates heal waves and damage waves |
| 10 | Corvariatio | Change · Blaster | A (situational) | Three random card outcomes, one defensive |
| 11 | Waxula | Dark · Mastermind | B | Damage arrives through an untargetable summon on a timer |
| 12 | Glampa | Light · Mascot | B | Does nothing for the first 8s by design |
| 13 | Hamburgoof | Satiation · Blaster | C | Engine needs Attack SPD it does not generate |
| 14 | Umpurrella | Beauty · Mastermind | C | Lightning picks random targets |
| 15 | Pomparrot | Competition · Explorer | C | 70% basic attacks during its own buff state |
S tier
1. Mesmerith

Spellbinding Sleepwave sends three waves at the largest enemy cluster for 200% Magic DMG each, with falloff when more targets are hit. Any enemy struck by all three is Stunned for 1.5 seconds, and the passive stuns the first attacker that closes in.
That stun is why Mesmerith sits first. Camcorgi’s crits and Energy refund both depend on enemies being controlled, and Mesmerith provides that from range while dealing cluster damage of its own. Lumehart’s MR shred makes its magic damage hit harder, and Parayaya‘s ultimate reaches full value only with a 5-star Hate Anima on the board.
Its weak spot is a spread-out enemy board. Without a cluster, few targets get hit by all three waves, and you are left with separate 200% hits and no control. Hate itself is thin: five ranked Anima, and only Rosfurcate joins Mesmerith above C tier. Add Mesmerith to another cluster instead of building Hate around it.
2. Bladehound
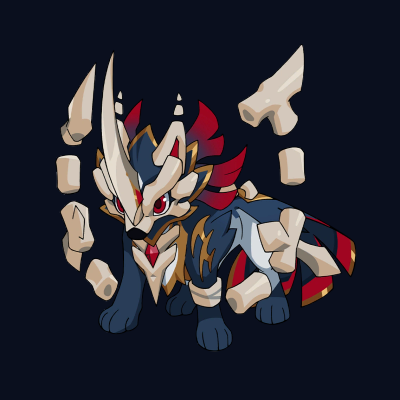
Blighted Bonespikes hits everything within two hexes for 330% Physical DMG. Adjacent enemies take another 15% of Bladehound’s Max Health as damage and are Stunned for 2 seconds, and the passive turns 2% of Max Health into ATK. Every point of Health you invest is also damage, which no other 5-star offers.
Both the bonus damage and the stun reach only one hex, though. If the enemy keeps its distance, Bladehound is a 330% nuke and little else. It works best behind or beside a second front-row body that holds enemies in place, such as Hoppelon or Felinoxie, with Lumeridon’s 30% damage-taken debuff on the same targets.
It ranks second because it has to stand in the fight to use its kit, while Mesmerith works from range. A board with a durable Protector already in place narrows that gap. Strength now also holds Cumulon and three C-tier units, but Bladehound does not need an Aspect partner.
A tier
3. Camcorgi

Cheese! freeze-frames enemies in a fan-shaped area for 2.5 seconds and fires 50% plus 12 photos at them, each for 100% Physical DMG, with one extra photo per 50% of bonus Attack SPD. The passive makes attacks on freeze-framed targets always Critically Hit, and Camcorgi regains 5 Energy whenever any enemy on the field becomes controlled.
Give Camcorgi a second control source and it becomes the highest-ceiling carry here: Mesmerith’s stun, Inkicorn’s stun and Faeflux’s imprison each refund Energy and set up crits. Leave it as the only control on the board and it plays like a mid-tier damage dealer with a long cooldown.
Its Memory partners are Framamba and Cinechel; Inkicorn, now an Oblivion unit, still supplies a stun. Framamba gives adjacent allies in its row 30% more basic-attack damage and 30% Attack SPD for 5 seconds, and Cinechel’s Armor Shred makes Camcorgi’s physical photos hit harder. Attack SPD is also what adds photos. Framamba’s 30% and Chowpownd’s 24% come to 54% on paper, past the 50% step for one extra photo, but we have not seen whether the two buffs add together that simply, so treat the extra photo as untested.
4. Chowpownd
Megamunch turns the nearest enemy into dessert for 550% Magic DMG and makes it untargetable for 2 seconds. For 8 seconds afterward, Chowpownd and every ally in its row get a shield equal to 16% of the target’s Max Health and 24% Attack SPD. Its basic attacks deal 60% bonus Magic DMG and heal the lowest-Health ally for 60% Health.
It improves almost any board it joins, as long as it has company in its row. Placed alone, its shield and speed buff land on nobody. Units that scale from Attack SPD gain the most from standing next to it, and Hamburgoof is one of them, which is where Hamburgoof’s conditional verdict below comes from.
Chowpownd is fourth rather than third because its ceiling is fixed, while Camcorgi’s grows with the control around it.
5. Cumulon
Wandering Cloud Waltz fires 18 swords at up to three of the lowest-Health enemies, for 50% Physical DMG each. Cumulon runs on a seven-point Charge instead of Energy, builds Charge with special basic attacks, and converts 65% of Attack SPD changes into ATK.
Use it as a finisher on a board that already wears enemies down, such as one built around Hoppelon. Asked to open a fight, it spreads 18 small hits across healthy targets. It is now a Strength Anima beside Bladehound. The other three Strength units are C tier, so a Strength count needs one of them, and neither 5-star depends on the bonus.
6. Lumehart
Stag’s Call summons six Jadeblossoms for 100% Magic DMG each. Every hit cuts the target’s MR by 4 until the end of battle and applies Kindlelight. Every third cast becomes a Hartheart that leaps to the farthest enemy for 250% along its path, with bonus damage on marked targets.
The shred compounds for every magic unit on the board, so Lumehart belongs with Mesmerith, Chowpownd and Glampa. On a board whose carries deal physical damage, most of that value goes unused.
7. Hoppelon
Pocket Bastion grants a 550% Shield and Counterattack Mode: 25% less damage taken, plus a 150% Physical DMG counter on adjacent attackers once per second. When the shield breaks, Hoppelon scatters into three apple hoplites that inherit a share of its stats. It reforms with 30% less Max Health once two of them fall.
The enemy has to kill it twice, which makes Hoppelon the answer for a board whose carry dies before it casts. A board that already survives gets little from it, since it adds no damage to a winning position. It now counts as Reality, alongside Mimoo, and still sits in front of Eggnok and Cumulon as an off-Aspect pick on the Competition Arena board in our team building guide.
8. Cinechel
Rewind heals Cinechel over time: 50% of the damage it took in the 2 seconds before casting, plus 18% of its starting Max Health. When Rewind ends, enemies within 2 hexes take 30% Armor Shred for 4 seconds, and Cinechel’s next 4 basic attacks become flashes that hit a 2-hex fan five times each. Our database lists each flash at 1.0% Physical DMG, which looks low next to the rest of the roster and is the one number in this entry we would re-check.
It earns A tier as a front-row Memory unit that heals itself through incoming burst and then shreds Armor around it. That shred matters most to physical damage, which includes Camcorgi’s photos and Framamba’s bolt, so Cinechel fits the front of a Camcorgi board. It does not supply control, so Camcorgi still needs Inkicorn or another stunner for its Energy refund.
9. Dragamour
Heart’s Benediction runs on a six-point Charge and alternates between Support and Damage modes. Support waves heal nearby allies and build to team shields and Attack SPD. Damage waves hit.
You get a Biggun that heals the units around it while it fights, but you do not choose which mode fires when. Its natural partner is Heartcease, the only other Love unit above C tier.
10. Corvariatio (situational)
Nexus’ Capricious Nature draws two Nexuno Cards. Double Blue gives Attack SPD, damage and Energy; Red and Blue fires a piercing attack; Double Red grants brief untargetability. The average outcome is A-tier. The floor is a defensive card when you needed damage, and you have no say in which one you draw. It anchors Change with Faeflux and Damasque, a small cluster where three of the four ranked units are B tier or better.
B tier
11. Waxula
It and Its Cat summons Count Wax at the densest enemy point. The Count blinks there and releases bat swarms for 3 seconds, dealing 75% Magic DMG every 0.25 seconds in a 1-hex radius; it is untargetable and decays over time. Waxula cycles between Black Cloak and White Wax forms and heals the Count while in White Wax.
Raise it if you are building Dark, where it is the 5-star at the top of the deepest quality cluster in the roster. If you need damage on a schedule, look elsewhere: the Count arrives on a timer, and the form cycle keeps Waxula busy with upkeep.
12. Glampa
Glampa starts the battle asleep, gaining 2% damage dealt and 3% Omnileech per second, plus more whenever an ally falls. It wakes after 8 seconds, at 50% Health, or when the team drops below 50%, and throws the nearest enemy for 600% Magic DMG and a 2-second Stun with 200% splash, cleansing itself and gaining 45 Armor and MR.
A board built to outlast gets a bigger throw the longer the fight runs. A board that wins in under 8 seconds gets nothing from Glampa at all.
C tier
13. Hamburgoof
Burger Disassembly fires three barrages of five burgers at the target and nearby enemies, reloading between barrages. Basic attacks fire toppings that rotate after each skill use: Tomatoes shred 3 Armor per hit until the end of battle, Patty raises damage to 110%, and Cheese grants 1.5% Attack SPD per hit until the end of battle. Reload time and barrage speed both improve with Attack SPD.
Stacking Armor shred and Attack SPD across a whole battle is what a carry wants, and on paper Hamburgoof does both. It sits in C tier because it generates almost none of the Attack SPD its own kit runs on, and Cheese only comes around every third cycle.
Chowpownd could change that. It gives its row 24% Attack SPD for 8 seconds after each Megamunch. The two no longer share an Aspect (Chowpownd is now Insatiability), but the row buff does not depend on Aspect. We have not seen the pairing tested, so Hamburgoof stays C on the Tier List. If the launch build shows Chowpownd’s buff keeping the barrages flowing, Hamburgoof is the C-tier unit most likely to move up, and the first one we would test.
14. Umpurrella
Der Sturm Sonate parks a Meow Cloud over the target for 6 seconds. It strikes four random enemies within two hexes with five Thunderbolts (90%) and three Megabolts (175%), keeps Umpurrella immune to control for the duration, and heals the three nearest allies for 10% of the cloud’s total damage when it ends. The total damage is fine, but random targeting spreads it across whoever happens to be nearby, so it rarely finishes anyone. Beauty has only one other unit above C tier, Plumelune, so there is no cluster reason to raise it either.
15. Pomparrot
Festival of Fireworks puts Pomparrot into a 5-second Party state with 4 extra hexes of range, 50% Attack SPD and firework basic attacks for 70% Physical DMG with 1-hex splash. When the state ends, a 270% firework hits the whole field and applies 33% Deep Wounds for 5 seconds. That field-wide anti-heal is worth having. The 70% basic attacks, inside its own buff window, are 3-star numbers. Competition already has Eggnok, Marshalbird and Furrari at B tier, so you would not pick Pomparrot to fill a Competition slot either.
Level 18 and Bond Encounter advice
At Level 18 the milestone offers Mesmerith, Bladehound, Camcorgi and Cumulon, and our Level 18 guide covers the choice in detail. Going by the ranking above: take Mesmerith if you have no plan yet and Bladehound if your board lacks a front line. Camcorgi needs a second control source to be worth it, and Cumulon needs both control and a front line already in place.
In Bond Encounters, Chowpownd, Lumehart and Hoppelon improve a board without needing a specific partner. Waxula is worth bonding for the Dark cluster even though it is B tier on its own. Take Pomparrot and Umpurrella when they appear, since bonding is free, but do not spend materials on them.
Before spending materials on a 5-star, you can drop it into a draft board in our Formation Builder and see which Aspect counts it completes.
Honkai Nexus Anima 5-star FAQ
Which 5-star Anima is the best in Honkai: Nexus Anima?
On the Evolution Test data, Mesmerith. It deals cluster damage and stuns anything hit by all three waves, and the other top carries depend on that kind of control.
Is Bladehound better than Mesmerith?
Bladehound has the larger multiplier and scales with Health, but its bonus damage and stun only reach one hex. Mesmerith works from range. Which one is better on your board depends on whether you already have a front line.
Is Camcorgi worth picking at Level 18?
Only with a control source such as Mesmerith, Inkicorn or Faeflux, because its guaranteed crits and Energy refund both require a controlled enemy.
Which 5-stars should I not invest in?
Pomparrot and Umpurrella. Hamburgoof is also C tier today; pairing it with Chowpownd is the one thing that might change that.
Are there more than 15 five-star Anima?
Third-party sites list some of the 18 Evolution Test additions as 5-star. None of those ratings is confirmed in-game, so we cover only the fifteen with verified kits here. The other 18 are tracked in the Evolution Test roundup.
Sources
- Skill text and stats: our Anima Database, captured from the Evolution Test client (July 9 to 27, 2026) and checked October 17, 2026. Aspects and Traits updated November 10, 2026; how they are sourced: Anima data.
- Test period and access: HoYoverse, Evolution Test recruitment announcement and Evolution Test FAQ, HoYoLAB.
- Community comparison, not used for our tiers: 小铭同学qaQ233, “【崩坏因缘精灵】角色强度梯度排行——进化测试”, Bilibili, July 22, 2026, BV1xFgr6DEaV.
1 thought on “Honkai Nexus Anima 5-Star Anima Ranked: All 15 Explained, Best to Worst”